Difference between revisions of "Mini Debian"
| Line 21: | Line 21: | ||
* Insert the [https://www.debian.org/download CD/ISO/whatever] & boot the machine/VM from it. | * Insert the [https://www.debian.org/download CD/ISO/whatever] & boot the machine/VM from it. | ||
** I'm running it as VMs under ESXi | ** <span style="text-decoration: line-through;" >I'm running it as VMs under ESXi</span> | ||
*** "ESXi 6.7 VM", "Linux", "Debian GNU/Linux 10 (64-bit)" | *** <span style="text-decoration: line-through;" >"ESXi 6.7 VM", "Linux", "Debian GNU/Linux 10 (64-bit)"</span> | ||
*** 4 CPUs, 4GB memory, 16GB storage | *** <span style="text-decoration: line-through;" >4 CPUs, 4GB memory, 16GB storage</span> | ||
** These days, I'm running it as VMs under Proxmox | |||
*** "Linux", "5.x - 2.6 Kernel" | |||
***4 Cores, 4GB memory, 16GB storage | |||
***Pretty much leaving everything else default... | |||
* When the installer menu appears, select "'''Install'''" rather than the default "'''Graphical Install'''" option | * When the installer menu appears, select "'''Install'''" rather than the default "'''Graphical Install'''" option | ||
* Cruze along configuring the system to your liking until you reach the screen titled "'''[!] Software selection'''" | * Cruze along configuring the system to your liking until you reach the screen titled "'''[!] Software selection'''" | ||
| Line 33: | Line 37: | ||
[[Linux - Mini Debian - Pictures{{!}}The sequence in pictures...]] | [[Linux - Mini Debian - Pictures{{!}}The sequence in pictures...]] | ||
<span style="color: #169179;" >Upon first boot up of your new system:</span> | <span style="color: #169179;">Upon first boot up of your new system:</span> | ||
* <code>sudo apt update</code> | * <code>sudo apt update</code> | ||
* <code>sudo apt upgrade</code> | * <code>sudo apt upgrade</code> | ||
<span style="color: #169179;" >(Because there're ALWAYS updates...)</span> | <span style="color: #169179;">(Because there're ALWAYS updates...)</span> | ||
=Configuring the minimal Debian= | =Configuring the minimal Debian= | ||
Revision as of 00:48, 23 October 2022
| 11 (bullseye) | well... duh... |
So...
A full desktop system as a server VM really is a bit silly.
Let's do something different.
Installing a minimal Debian
- Insert the CD/ISO/whatever & boot the machine/VM from it.
- I'm running it as VMs under ESXi
- "ESXi 6.7 VM", "Linux", "Debian GNU/Linux 10 (64-bit)"
- 4 CPUs, 4GB memory, 16GB storage
- These days, I'm running it as VMs under Proxmox
- "Linux", "5.x - 2.6 Kernel"
- 4 Cores, 4GB memory, 16GB storage
- Pretty much leaving everything else default...
- I'm running it as VMs under ESXi
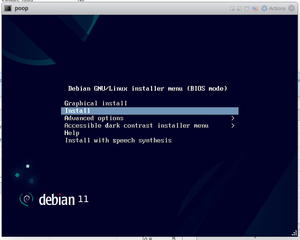
- When the installer menu appears, select "Install" rather than the default "Graphical Install" option
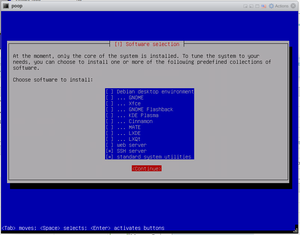
- Cruze along configuring the system to your liking until you reach the screen titled "[!] Software selection"
- Make sure that only SSH server and standard system utilities are selected, then continue
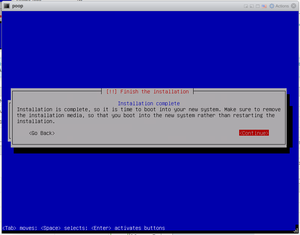
- Keep cruzing along until it tells you Installation complete
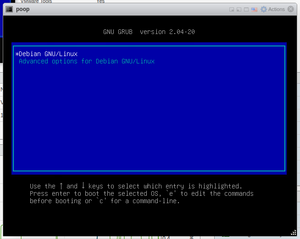
- When you tell it to continue, the system will reboot.
All done
Upon first boot up of your new system:
sudo apt updatesudo apt upgrade
(Because there're ALWAYS updates...)
Configuring the minimal Debian
Install & configure sudo
By default, root account is not enabled for login (other than directly at the console) to Debian. As a result, sudo authentication is needed. (But it doesn't seem to be installed by default...)
- Log in to the Debian machine and switch to root using the
sucommand.su -- (remember that root pasword you picked during install?)
- If
sudois not installed, install the sudo package using the following command:apt install sudo
- Add an existing user with id=USER to group=sudo:
adduser USER sudo
- Log into the USER shell, and type the following command to verify that the user is authorised:
sudo -v
You have successfully configured sudo in Debian.
Install & configure vim
sudo apt install vim
Then fix the Visual Mode silliness...
vim ~/.vimrc
set mouse-=a
syntax on
Do the same for when you use it vi sudo...
sudo vim /root/.vimrc
Aliases for ls
ls needs it's aliases set. (Who in heck doesn't use ll for ls -l???)
vi ~/.bashrc
Scroll down & you'll see:
# some more ls aliases
#alias ll='ls -l'
#alias la='ls -A'
#alias l='ls -CF'
Un-comment those aliases!
source ~/.bashrc
More Configurations
- Setting up NFS for file sharing
- Installing Samba from the command line
- Adding a new drive from the command line
- A better .bashrc for root
Usage notes
Missing commands
If you're used to Ubuntu-derived Linuxes, you may note that a lot of commands cannot be found while signed in as a regular user. Before attempting to install them, check with sudo or while signed in as root. The root user account has a different search path that includes the programs that are normally not allowed to regular users anyhow.
One good example:
ifconfig results in-bash: ifconfig: command not found
but...
sudo ifconfig results in details about your network connection(s)
OTOH...
ip a does similar & is a more modern replacement.

